This easy fermented garlic is made with just two ingredients, whole garlic cloves and water. Lacto-fermented garlic can be used instead of raw garlic in your favorite recipes.
Each year when the weather begins to cool down in the fall, I start fermenting vegetables.
Occasionally I'll get really ambitious and try to ferment lots of different veggies, because I love doing little science experiments in the kitchen.
Last winter I made big batches of homemade sauerkraut, red cabbage sauerkraut, and (you guessed it) fermented garlic.
But guys, there's a reason I didn't share this garlic recipe with you earlier.
My first batch of fermented garlic was almost my last batch, because it made my entire apartment smell like we were constantly baking garlic bread.
At first, it smelled nice. But the smell got old fast.
Really fast.
Happily, after some troubleshooting, I'm happy to report that I've successfully contained the garlic odor, and I can help you do the same!
Plus, I loved this garlic even more than I expected, and wanted to show you how to make it.
This easy fermented garlic uses a simple lacto-fermentation technique, and is a gut-healthy, easy to digest vegetable.
Looking for more fermenting ideas? Try making fruit vinegar, homemade yogurt, Instant Pot yogurt, homemade milk kefir, homemade water kefir, and homemade kombucha.
Why Make Fermented Garlic?
There are a few reasons!
Fermenting garlic preserves the shelf-life.
Yes, if stored properly, garlic already has a fairly long shelf-life, but fermented garlic lasts even longer. Store your fermented garlic in the fridge and it will last at least six months (or longer).
After fermenting, the garlic is peeled and ready to use.
If you, like me, avoid buying pre-peeled garlic cloves, this is a nice alternative. You can buy whole heads of garlic, peel them yourself, ferment them, and then the garlic is peeled and ready to use.
Lacto fermenting introduces healthy bacteria and makes the garlic easier to digest.
And yes, garlic can be hard to digest, especially in garlic-heavy recipes. Low FODMAP diets often suggest eliminating garlic because it can trigger digestive issues in some people.
If you love garlic but it upsets your stomach, fermented garlic might be your friend.
Want to learn more about lacto fermentation? I recommend reading Wild Fermentation by Sandor Katz.
How to Use Fermented Garlic
You can use it in almost any recipe that calls for garlic! Simply swap the raw garlic for fermented garlic and proceed with the recipe.
I like using this fermented garlic in garlic-heavy recipes such as French garlic mashed potatoes, classic marinara sauce, and garlic cauliflower mash.
That said, fermented garlic probably isn't a great swap for any recipe where the garlic is cooked inside the papery peel (such as roasted garlic).
How to Contain the Smell of Fermenting Garlic
Fermenting garlic has the strongest smell of any vegetable ferments I've done up to this point.
I learned this lesson the hard way.
Before fermenting your garlic, I suggest making a plan.
If you have a root cellar or another separate area to store your ferments, use it.
If you (like me) are fermenting in your living space, I highly recommend using airlock fermenting lids. They do an incredible job containing the odor.
Even with the airlock lids, you might occasionally get a whiff of garlic in the air. Here's my other trick.
If possible, set the garlic up higher than your counter tops. I used a kitchen shelf, but the top of your refrigerator is a great spot too.
Placing the garlic higher will help keep any garlic scent above where you can easily smell. It really does help!
If you're placing the garlic anywhere that you won't regularly look, set a phone alarm to remind yourself to check on the garlic periodically.
How Much Garlic Should I Ferment At Once?
As much as you're willing to peel.
I usually ferment four or five heads of garlic at a time, but this recipe will work with any amount of garlic.
How to Peel Garlic
I usually peel garlic by smashing it until the peel slides off, but this time you'll want to avoid smashing the garlic.
Instead, gently press a chef's knife against the garlic head to break apart the cloves.
Next, gently press the knife on each garlic clove to begin breaking the shell, and then peel by hand.
I've seen lots of garlic peeling hacks that involve shaking the garlic vigorously in a glass mason jar. I'll just say that it didn't work for me, but it apparently works for some people.

How to Ferment Garlic
After you've peeled all the garlic, it's time to start fermenting.
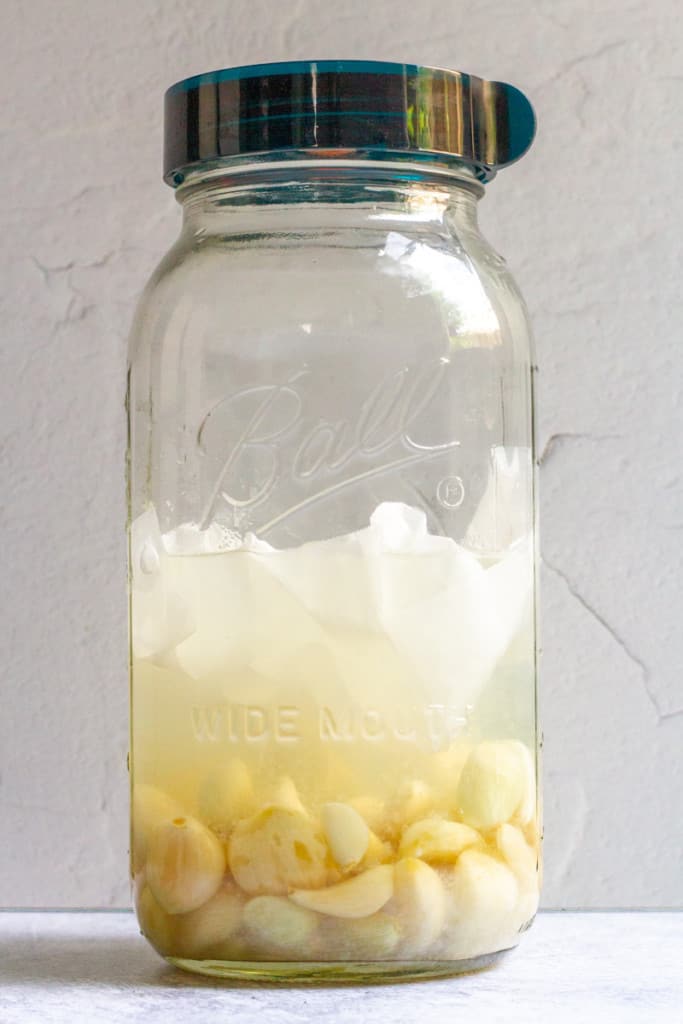
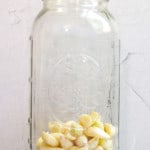
Add the peeled cloves to a clean glass jar. If you're using the airlock fermenting lids, you'll need a wide-mouth jar.

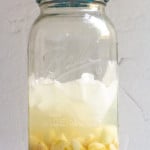
Cover the garlic with unchlorinated water.
Set a piece of parchment paper on top of the water to hold the garlic under the water.
If you're making a batch of sauerkraut at the same time, you could use a cabbage leaf instead of parchment paper.

Set the garlic aside for two to three weeks.
As it ferments, check on the garlic daily to make sure none of the cloves have popped above the water and parchment paper.
Troubleshooting Blue + Green Garlic
Sometimes garlic turns blue or green while fermenting.
The color change happens because of an enzyme reaction inside the garlic. Blue or green garlic is totally safe to eat, it just looks weird.
Fresh garlic is less likely to change color compared to old garlic, so if you're worried, stick with the freshest garlic you can find.
When I've fermented garlic, usually one or two cloves in the whole batch have turned blue or green.
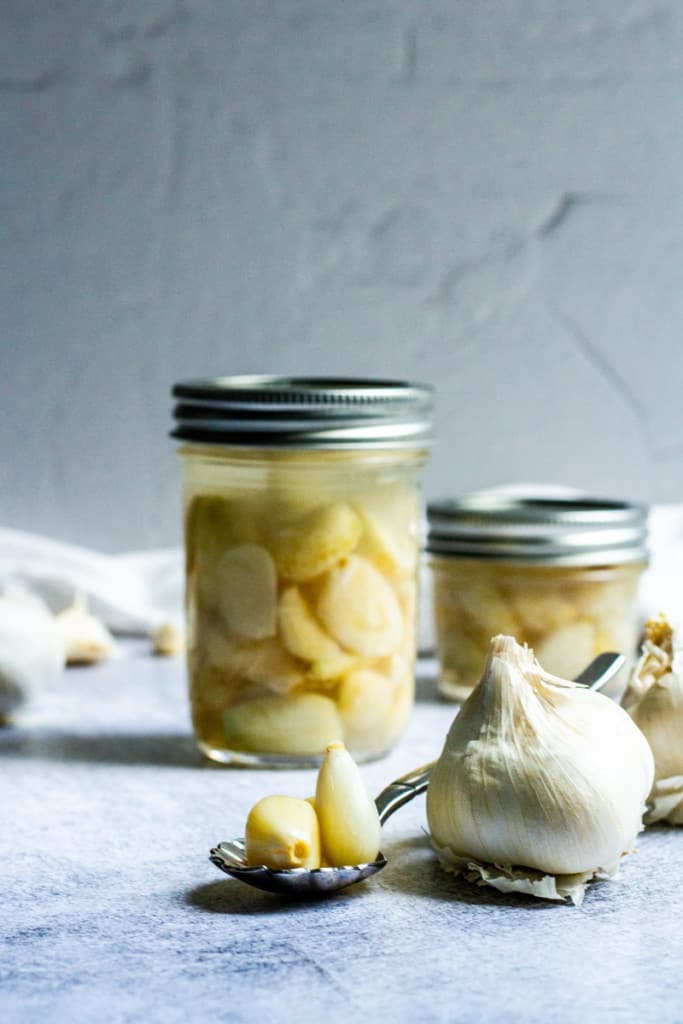
Storing the Fermented Garlic
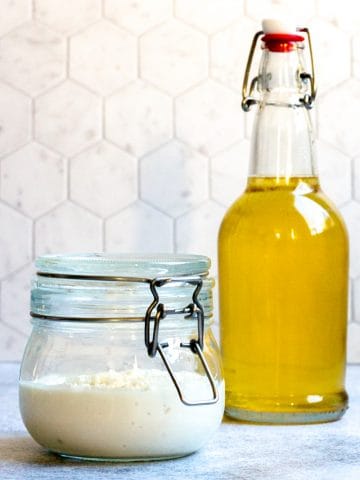
After fermenting, I like to scoop the garlic into smaller jars. Top the jars with the garlic brine (the water from the jar) and store the jars in the fridge.
When you're ready to use garlic, simply use a spoon to scoop it out of the jar!

This recipe is based on a garlic recipe in the book Fermented Vegetables by Christopher + Kristen Shockey.
Fermented Garlic
Equipment
- Large Glass Jar (2 quarts recommended)
Ingredients
- 4 heads garlic Or as much garlic as you're willing to peel
- unchlorinated water
Instructions
- Peel all the garlic cloves. Break apart the head by pushing down on it with the side of a large chef's knife. Gently press on the cloves to loosen the peel, and then use your fingers to peel off the papery skin.Try not to break or crack the cloves. Ideally they'll all be intact. (If a few crack, it's okay.)

- Place the garlic cloves in a clean glass jar. I usually use a half gallon jar. Smaller jars are fine, depending on how much garlic you use. The jar should be big enough to allow plenty of head space above the garlic.
- Completely cover the garlic with unchlorinated water. The water should be an inch or two above the garlic, but there should still be a 2"-4" space in between the water and the top of the jar.Place parchment paper on top of the garlic to keep it from floating above the water.Use an airlock fermenting lid (to contain the smell). Alternatively, cover the jar with a paper towel or tea towel, and secure with a rubber band. Do not seal the jar with a lid (such as a canning lid). The garlic needs airflow.

- Store the jar out of direct sunlight for 2-3 weeks. Check on the garlic daily to make sure it's staying below the parchment paper. If any garlic pops up above the paper, push it down.After fermenting, move the garlic to smaller jars and top with the fermenting brine. Use within 6 months for the best flavor.

Nico McLane says
This came out awesome! You are not kidding about the stink! I re-read the article to try and figure out how to know when it's done, since you say let it ferment 2-3 weeks... today is the 2 week mark and it tastes yummy, but i was going to let it go a few more days, out of curiosity.
Do you have any tips on how to know when to go into the fridge?
As a food geek, I can't help but wonder... how the fermentation affects the Alliinase in garlic... Alliinase facilitates the transformation of alliin to allicin. Alliinase is inactive when exposed to acid and heat, therefore it will not work after cooking or entering an acidic environment such as the stomach or vinegar preparations typically, but... I will try to find out for cure - if you beat me to it more power to you 😉
thanks!
Sarah Trenalone says
I'm so happy that you like it!!
I normally stick it in the fridge once the smell dies down a little bit, which is usually somewhere around the 2-3 week mark for me. But if it tastes good, you could put it in the fridge now!
As for the alliinase, I'm not sure! My guess is that the alliinase is what's causing the strong garlic smell, so the fermented garlic probably doesn't have as much active as raw garlic. But that's just a guess, so if you find anything else out about it let me know! I'm curious 😀
Hope that helps!
Kari Hayes says
just wondering if this is safe without using salt to kill bacteria? Also, how is it considered "lacto fermented" if there's no whey culture added?
Alisha Trenalone says
Hi Kari, whey culture isn’t needed for lacto fermentation, it’s just an additive that can help speed things up. For more info on lacto fermenting (including safety tips) I recommend the book “Wild Fermentation" by Sandor Katz. Hope this helps!
-Alisha at Champagne Tastes
Emily Friedman says
Hi! Also wondering why salt isn’t needed? Is it bc garlic is a natural antimicrobial?
On week 2 and excited to taste!!
Alisha Trenalone says
Hi Emily! Salt is not always required for vegetable fermentation, although plenty of people still choose to add it! The important things are to make sure the garlic stays in a relatively cool environment, has good airflow, and stays below the water level. I hope yours turns out well!
-Alisha at Champagne Tastes
Liz Moloney says
Hi Sarah,
I've just started my first batch of fermented garlic.
Thanks for all the tips.
One or two cloves started to have a blue/green hue.
Good to know they're safe to eat.
Regards
Liz