
This no-knead sourdough cinnamon bread is a beginner-friendly artisan loaf with raisins or dried cranberries. Proof overnight and then bake in a Dutch oven!
Are you in a baking kind of mood?
I am!
Specifically, I've been baking sourdough bread. Lots and lots of it.
We've been enjoying savory breads, like this basic no-knead Dutch oven sourdough bread and this rosemary garlic sourdough bread.
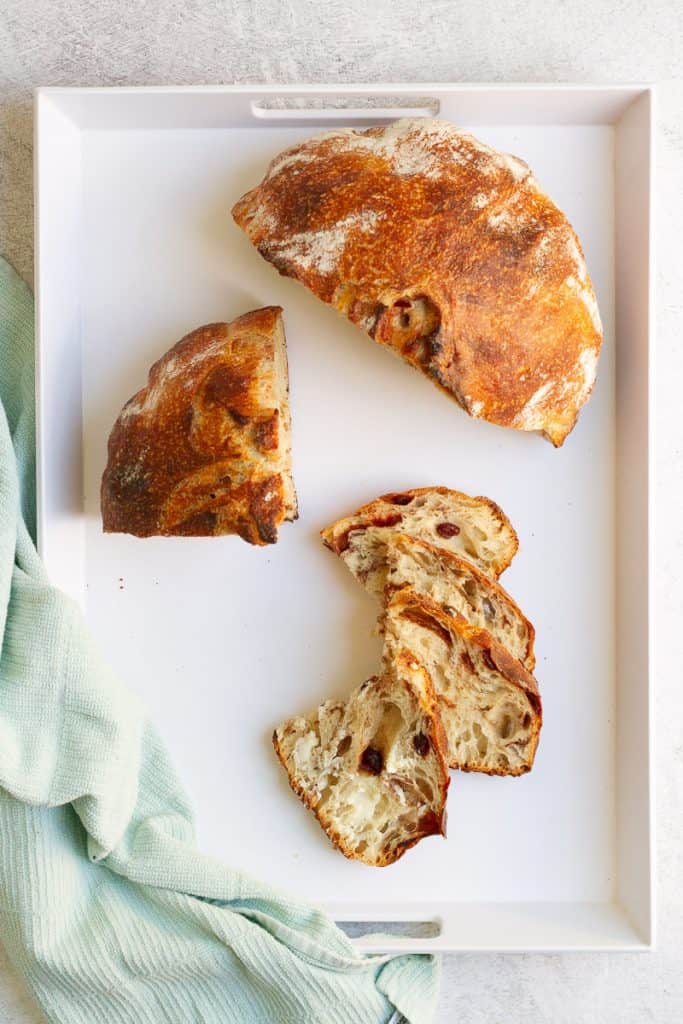
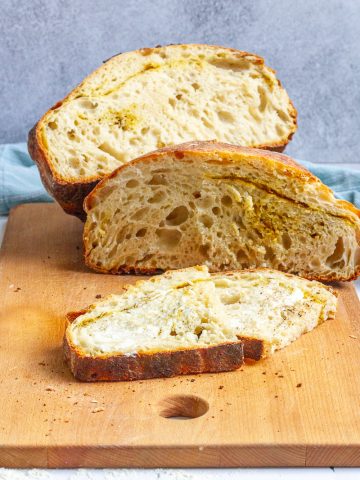
Most recently, I've been in the mood for something ever-so-slightly sweeter like this sourdough cinnamon bread. This is a no-knead, artisan-style sourdough bread that's baked in a Dutch oven.
Looking for more baked treats? Try these lava cakes for two, lemon ricotta ramekin cheesecakes, a Meyer lemon pie and vegan baklava.
Is This a Sweet Cinnamon Bread?
It depends!
If you prefer, you can leave the sugar out of this recipe entirely, or (my preference) only use a little sugar for just a hint of sweetness. For those of you with more of a sweet tooth, follow the recipe card suggestions for using extra sugar.
Keep in mind that this is still very much an artisan sourdough bread, with a crusty outer layer and a mild tang.
You won't mistake this bread for fluffy cinnamon rolls no matter how much sugar you add, but you can use extra sugar to turn this bread into a sweet treat.
Is This Sourdough Cinnamon Bread Difficult to Make?
It's not difficult, but it is time consuming. This bread takes two days to prepare from start to finish, but most of the time is hands-off.
Also, there are a lot of steps to follow, which may seem overwhelming if you're not used to baking sourdough bread. That said, this loaf is "beginner-friendly" in that there are no special techniques needed, not even dough kneading!
I recommend reading through this entire post (and the recipe card) in full before beginning. Make sure you have everything you need and that you (at least mostly) understand the process before jumping in.
Most importantly, have fun with your bake!
Can I Skip the Sourdough Starter?
No.
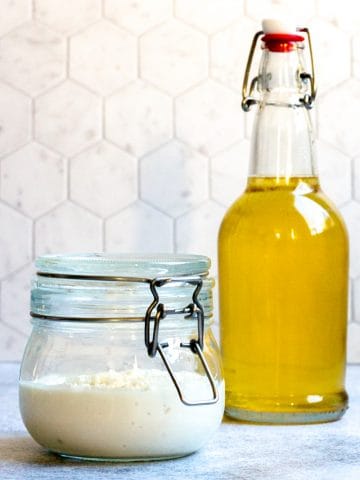
The sourdough starter provides the leavening in the bread, so without it your bread will not rise.
If you need a starter, check out my tutorials to make a kombucha sourdough starter, milk kefir sourdough starter or buy a sourdough starter.

Can I Use Sourdough Discard Instead of Active Sourdough?
No. For this recipe, you need to use the starter when it's active and bubbly, not after the bubbles diminish.
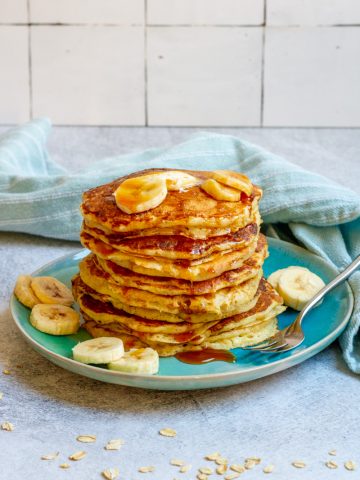
If you're looking for sourdough discard recipes, check out our sourdough blueberry pancakes, sourdough pumpkin pancakes and sourdough oatmeal pancakes.
Do I Really Need Bread Flour?
Yes. Bread flour is a high-gluten flour and bakes differently than all-purpose flour.
Bread flour should be easy to find at your local grocery store, but if you want to use all-purpose, you'll need to mix it with vital wheat glutens to make homemade bread flour. Check the recipe card notes for directions.
Can I Make This Sourdough Cinnamon Bread Gluten-Free?
Unfortunately, no.
This bread recipe relies on gluten to form the structure of the bread.
If you're looking for gluten-free baking ideas, check out our gluten-free sourdough pancakes or our gluten-free French crêpes.
Do I Need a Dutch Oven?
For this recipe, yes.
You'll want a five to seven-quart Dutch oven with high sides (not a braiser). I use a five-quart cast-iron Dutch oven.
What Other Equipment Do I Need?
I highly recommend using a digital kitchen scale to weigh your ingredients. I use this OXO digital scale.
It's also helpful to have a digital thermometer to know exactly when to take your bread out of the oven.
Other items that I've found helpful, but that are totally optional, are a large silicone pastry mat, a bread lame, a flexible dough scraper and a spray bottle filled with water.
Do I Need a Stand Mixer?
No!
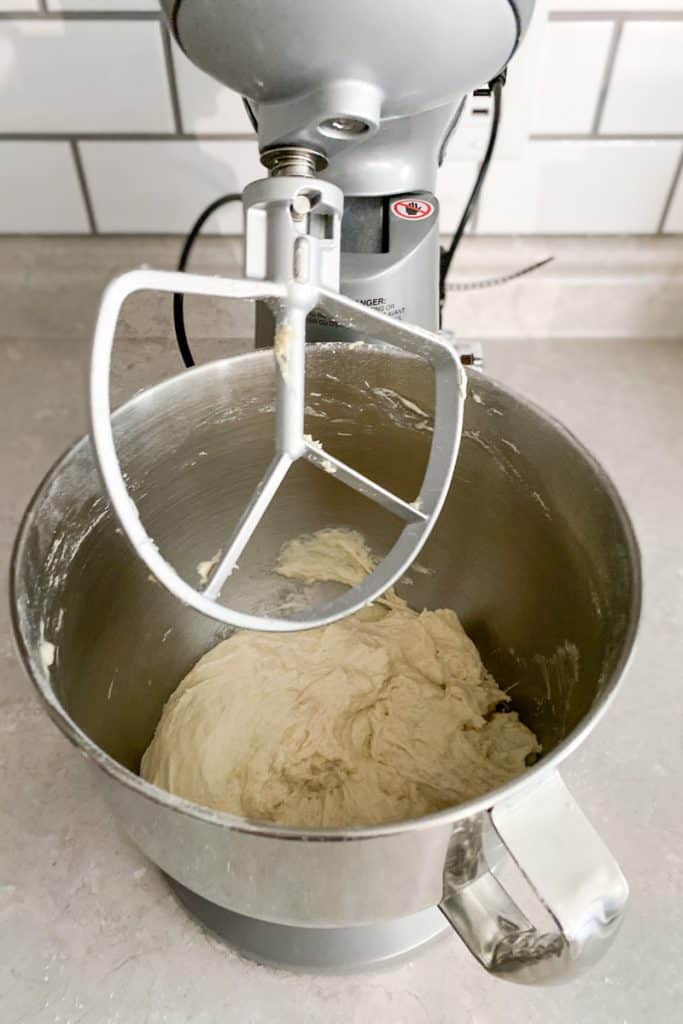
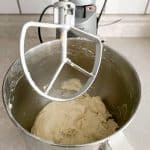
I do use the paddle attachment on my Cuisinart stand mixer to mix the sourdough cinnamon bread dough together, but all you really need is a spoon or a dough whisk.
Day 1: Make the Sourdough Cinnamon Bread Dough
The Autolysis Rest
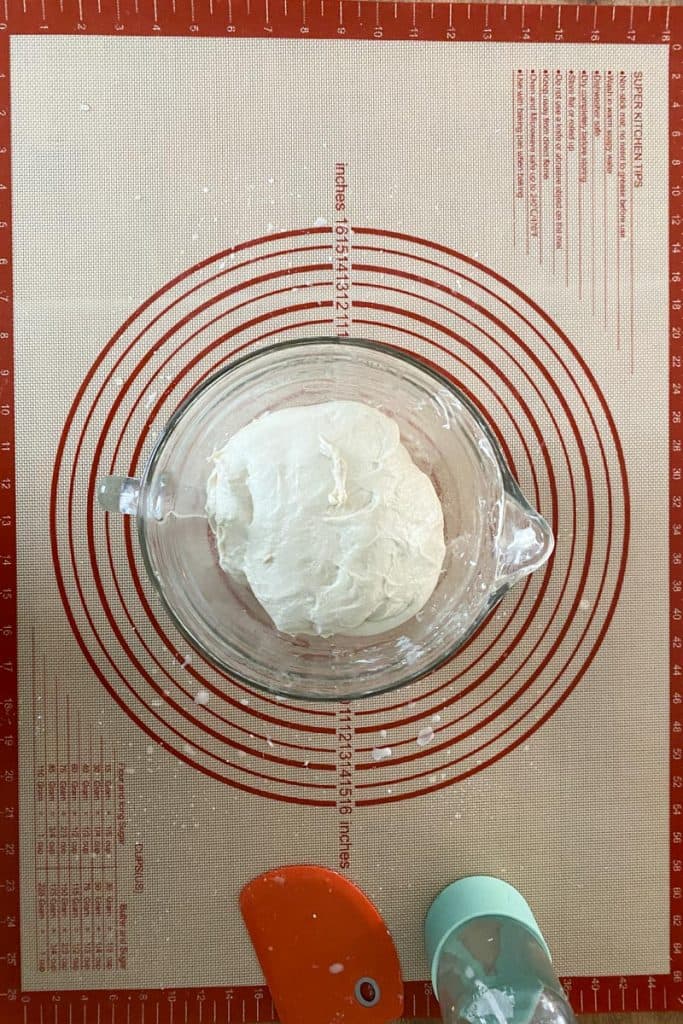
Start by mixing together the starter, bread flour and water. Mix until the dough no longer clings to the bowl.

Leave the dough to rest for about 20 minutes.
This rest period is called an autolysis rest, where the dough will begin to form gluten without kneading.
Next, add the salt to the dough.
Rest, Stretch + Fold the Dough
After adding the salt, place the dough in a bowl, cover with a damp towel and allow the dough to rest for one hour.
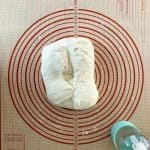
Next, move the dough onto a dampened work surface. I use a large silicone mat.
I find it's easiest to work with this dough if I periodically spritz water onto my work surface, hands and flexible dough scraper.
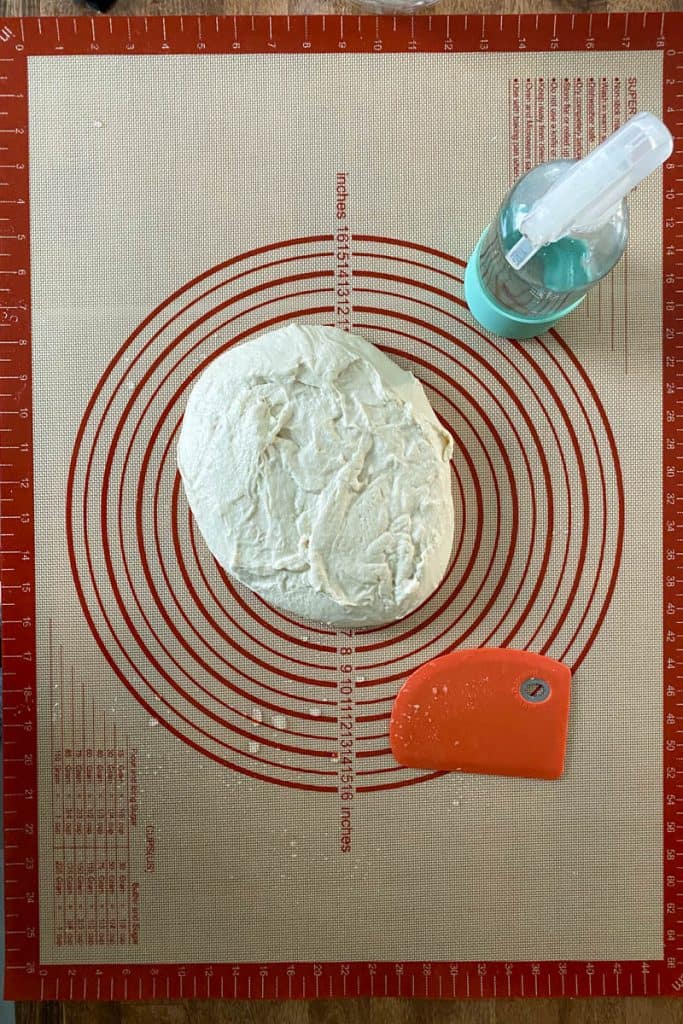
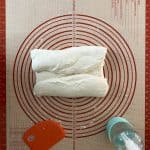
Stretch the dough out.
It doesn't have to be perfect, just use your hands to stretch it out until it (sort of) resembles a piece of paper.
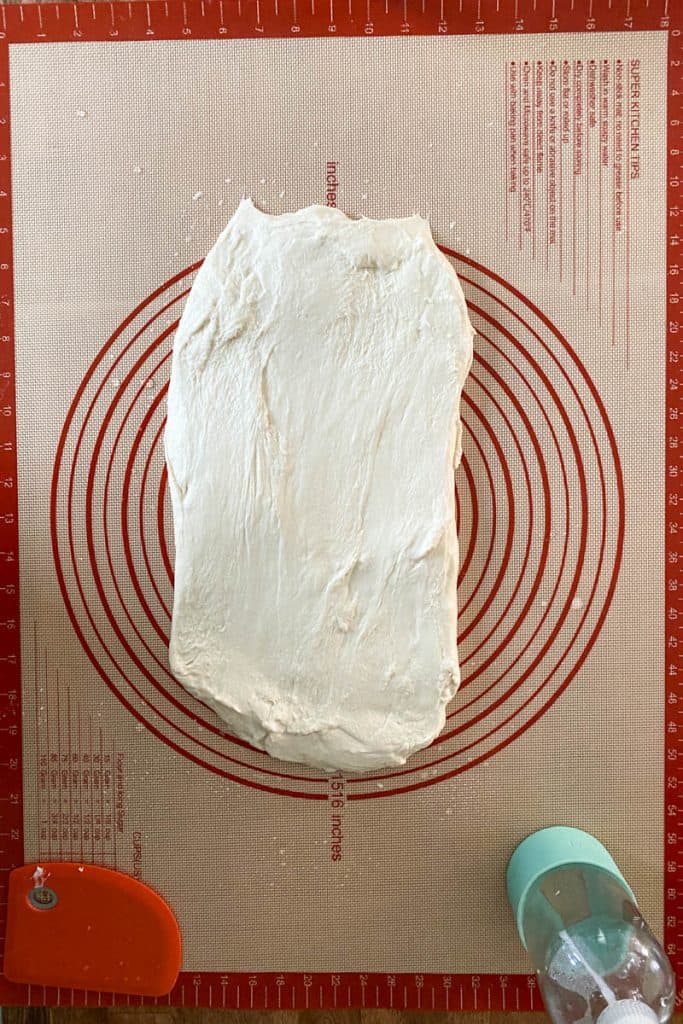
Next, fold the dough like a letter.
I typically fold the top down first and then the bottom up.
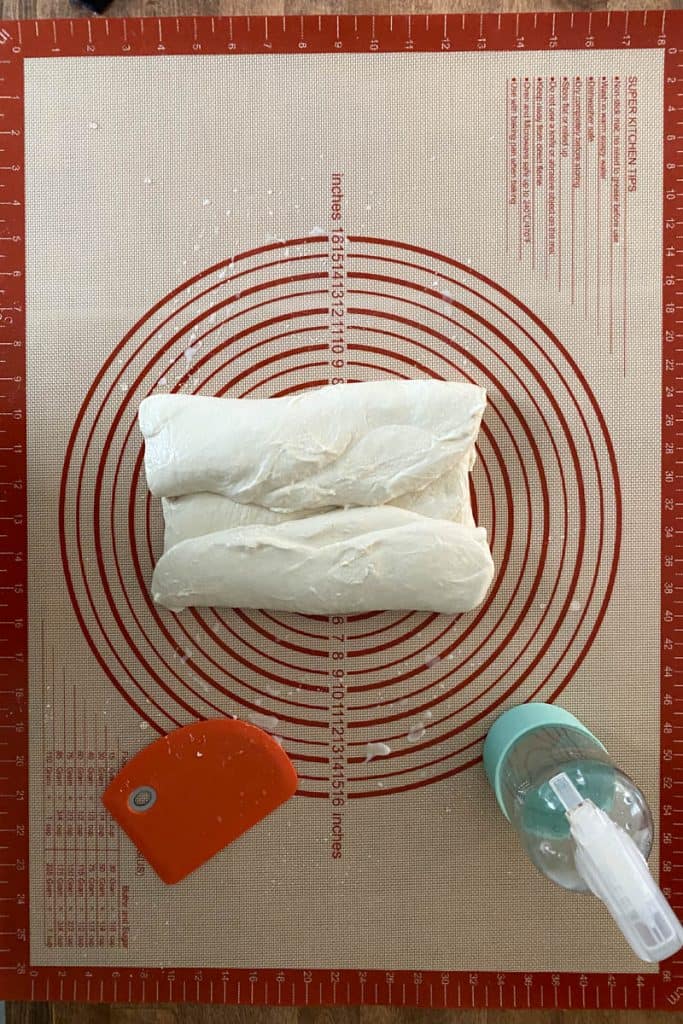
Fold the dough in thirds again, this time folding in from the sides.
You'll be left with a square(ish) piece of dough.
Flip the dough over to the other side.
Stretch and fold it again (exactly the same way) on the other side.
Return the dough to the bowl, place the damp towel back on top, and rest the dough for another hour.
You'll repeat this rest, stretch and fold technique two more times, for a total of three hours.
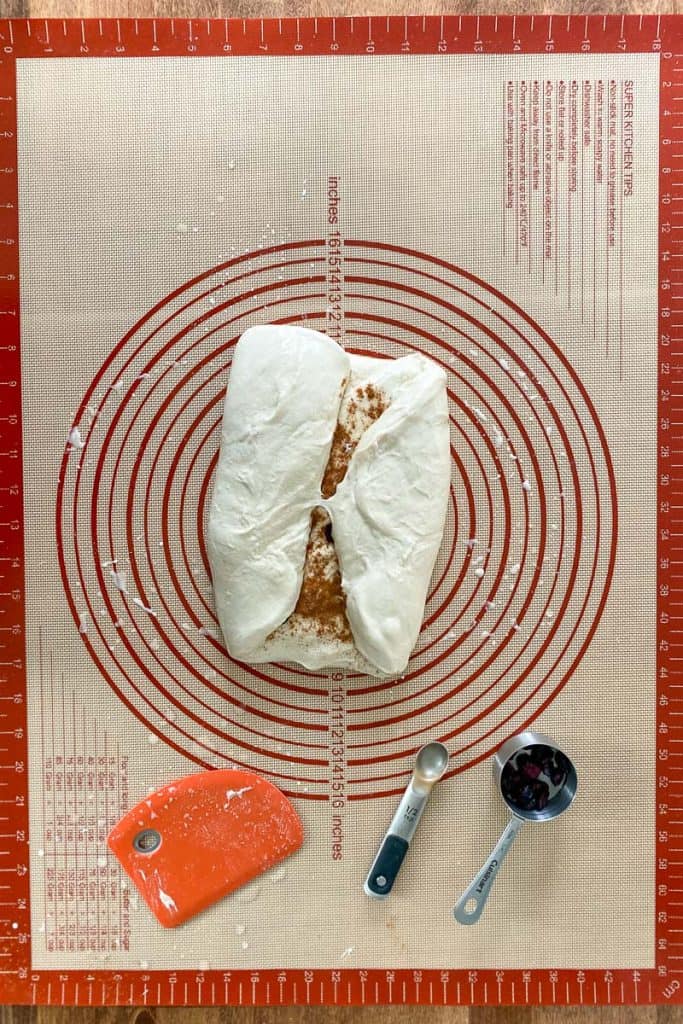
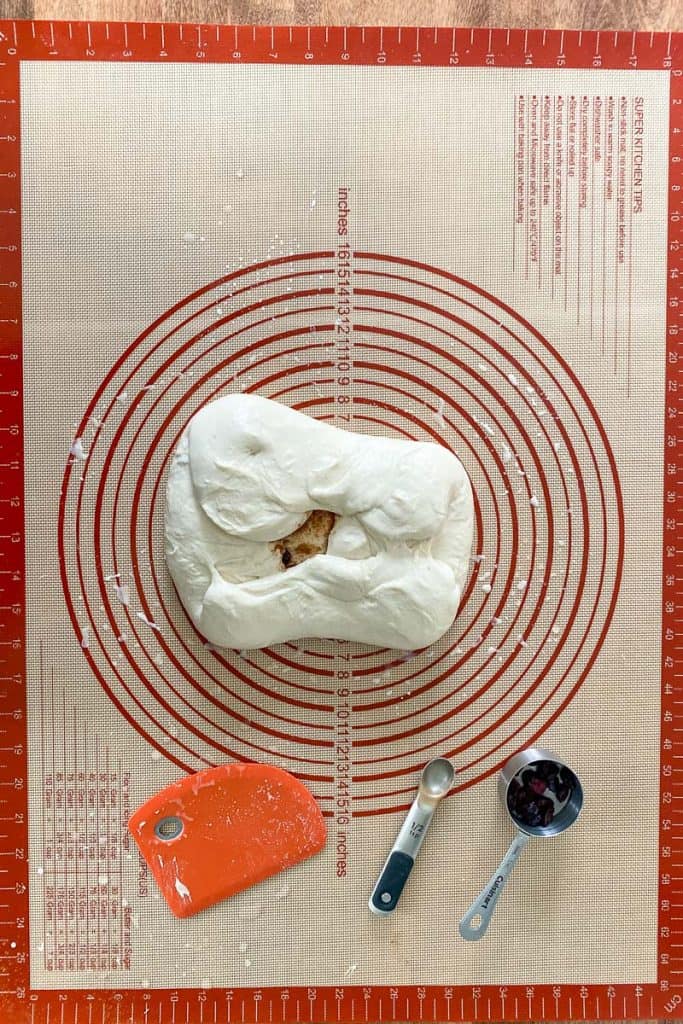
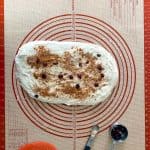
During the final stretching and folding period, you'll add the flavors.
Stretch the dough out (just like before). This time, sprinkle the cinnamon and sugar on top of the dough. Sprinkle cranberries or raisins across the dough.

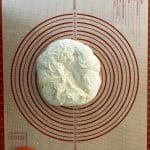
Fold the dough again.
When you're done folding, you'll be left with a square(ish) piece of dough. Just like before.
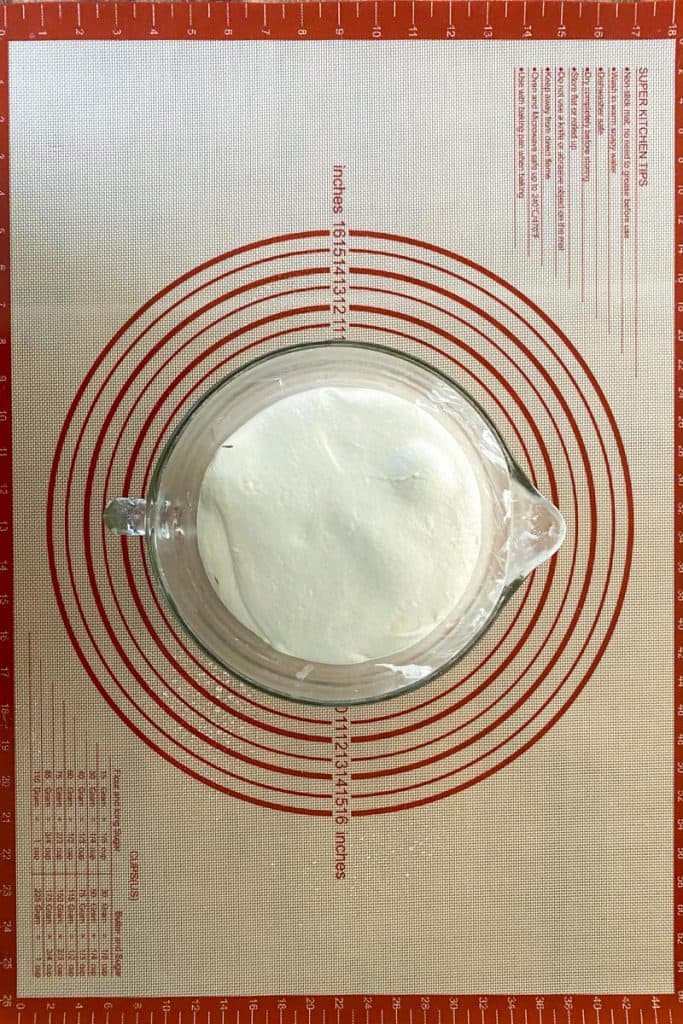
Proof the Dough Overnight
Next, you'll proof the dough.
I recommend using the refrigerator to proof the dough overnight.
If your fridge doesn't have room, you can also proof the dough at room temperature.
A room temperature proof is only a good option if your kitchen is fairly cool (or even cold), because warm temperatures will proof the dough too quickly. Over-proofed dough could result in odd-tasting bread or cause your loaf to deflate in the oven.
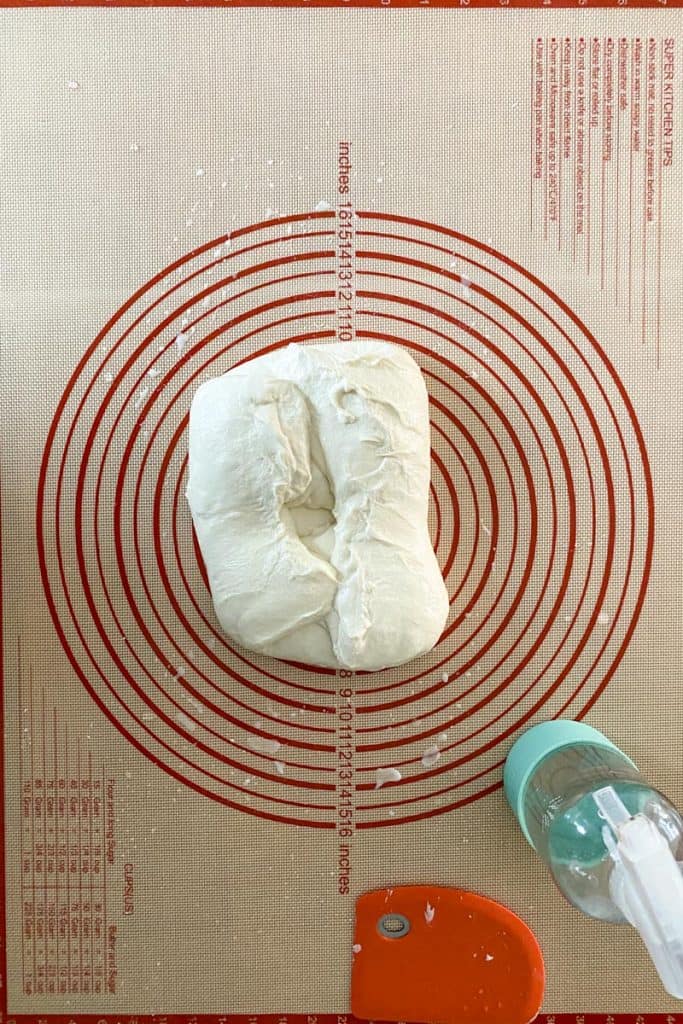
The dough is done proofing when you can gently press into the dough with a floured or oiled knuckle and the dough is slow to bounce back.
Day 2: Bake the Sourdough Cinnamon Bread
When your dough is done proofing, turn it out onto your work surface.
Pull the dough into a ball, and let it rest seam-side up for about 15 minutes.
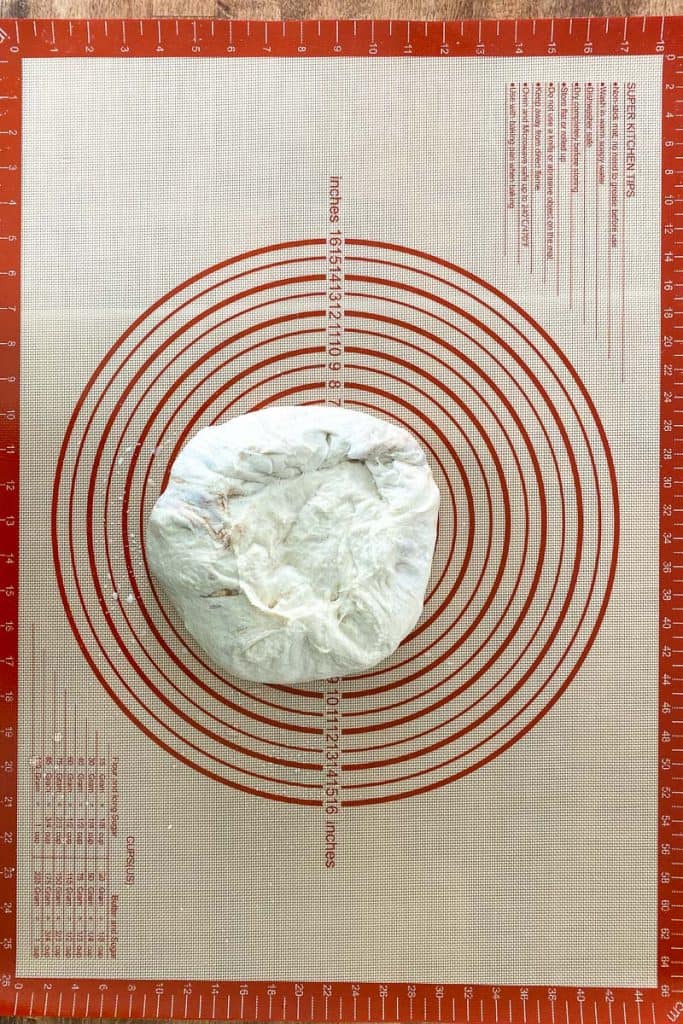
Next, roll the dough into a ball.
Place it on a piece of parchment paper.

If you proofed your bread in the fridge, let it warm up to room temperature for a few hours before baking.
Just before baking, dust your dough with flour.
Cut it with a bread lame or a floured knife. The cuts are meant to help release steam, but they can also be decorative.

Pre-heat the oven while your dough rests.
Place the dough into a Dutch oven and cook covered for 45 minutes.
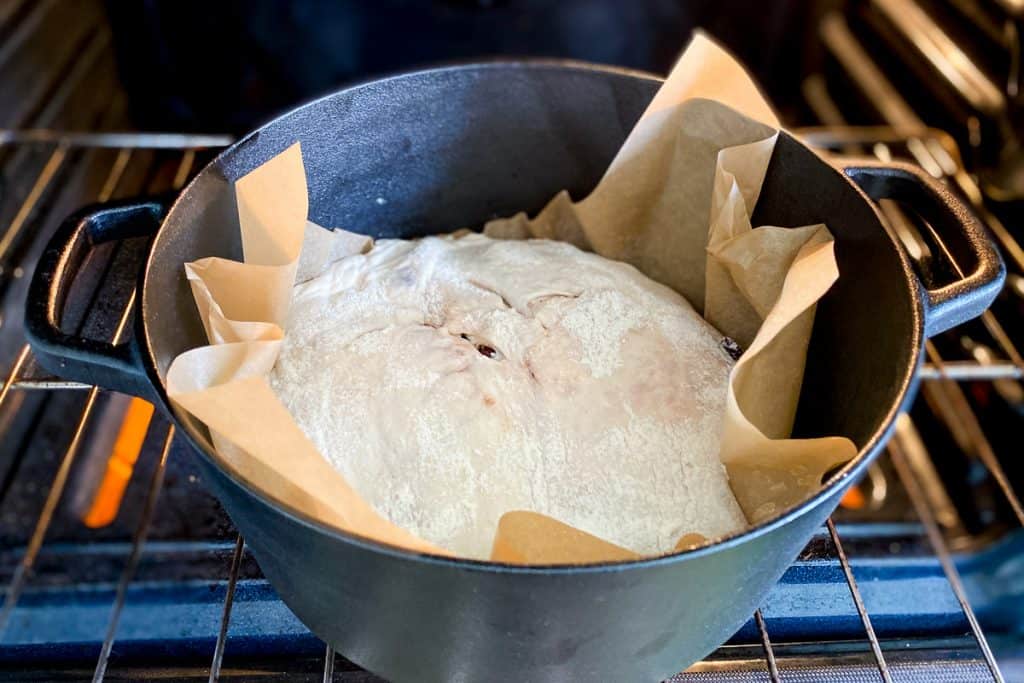
Next, take the lid off the Dutch oven.
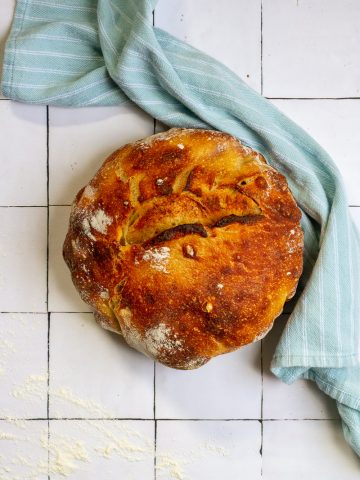
Your loaf should have a nice, round shape and be a pale golden color.
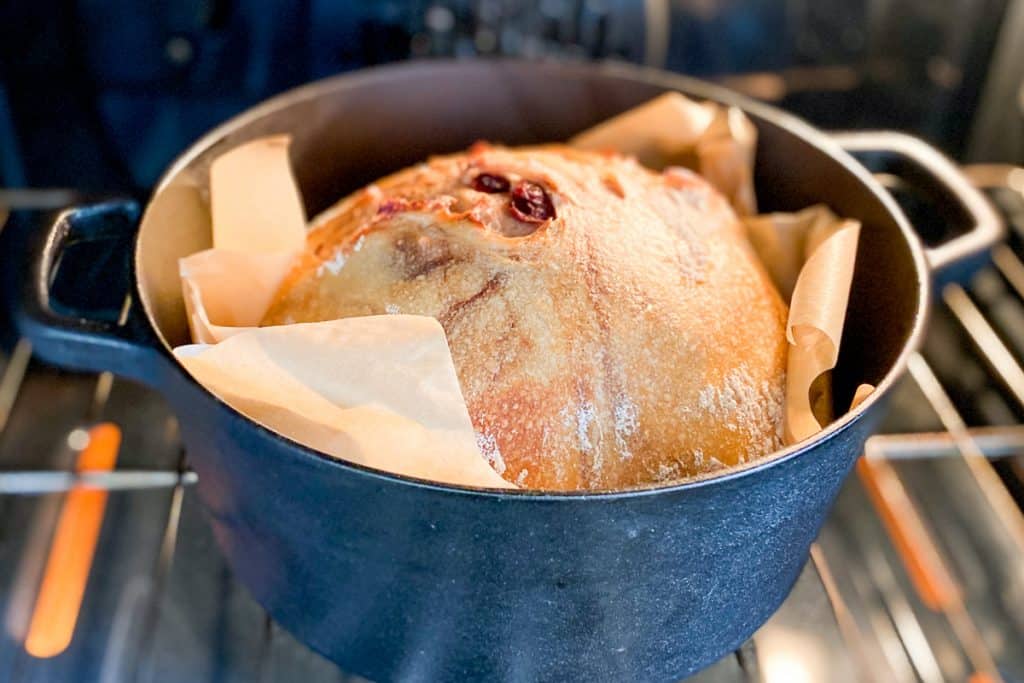
Cook 10 to 15 more minutes, or until a thermometer reads 210 degrees Fahrenheit.
At this point, your loaf should be golden brown.

Cool the Sourdough Cinnamon Bread Before Cutting
The next step is crucial. It might seem like it's the least important step, but it's actually one of the most important steps of all.
You must completely cool the bread before cutting into it. I usually leave my loaves on a cooling rack for two hours.
Yes, warm bread straight out of the oven is fantastic! But with an artisan-style sourdough, you have to let the bread cool down before cutting.
Why? Because the bread is still cooking internally, and if you cut it open early your loaf could be under-done and gummy.

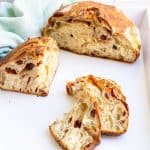
Finally, when your bread is cool, slice it open!
I usually warm my sliced sourdough up on a griddle or toaster before serving. Top the bread with a little butter and serve it along with a warm mug of French press coffee.

Sourdough Cinnamon Bread
Equipment
- non-reactive bowl for proofing (glass or stainless steel)
- spray bottle with water (optional but helpful)
- damp towel or plastic wrap
Ingredients
Sourdough Base:
- 1 cup active (ripe/fed) sourdough starter (227 grams) See "Sourdough Starter" in recipe notes
- 5 cups unbleached bread flour (602 grams) See "Measuring by Volume or Weight" and "Homemade Bread Flour" in recipe notes
- 1¾ cups water (397 grams)
- 1 tablespoon salt (18 grams)
Flavor Additions:
- 2 teaspoons sugar (optional, divided) For a sweet dessert bread, use 2 tablespoons of sugar instead
- 2 teaspoons ground cinnamon (divided) or 5-spice seasoning
- ¼ cup raisins or dried cranberries (optional, divided)
Instructions
Day 1: Make the Dough
- Combine the starter, flour and water in a large bowl or in the basin of your stand mixer. Do not add the salt yet.Use a large spoon or dough whisk to stir the dough together, or use the paddle attachment on your stand mixer to mix on medium-speed for about 60 seconds. Mix until the dough no longer clings to the bowl, and instead forms a ball.Allow the dough to rest about 20 minutes, and then add the salt.

- Incorporate the salt by mixing again with the spoon, whisk, or stand mixer until just mixed. You may need to use your fingers to help work the salt into the dough until you don't feel the salt crystals anymore.Place the dough in a non-reactive bowl (such as glass or Pyrex), and cover the dough with a damp towel. Allow to rise for one hour.
- Spritz a work surface with water and dampen your hands and (optionally) a flexible dough scraper.Gently move the dough onto the work surface. Using your hands or the dough scraper, spread the dough slightly and then fold the dough like a letter. (I fold the upper third down towards the center and then the bottom third up towards the center.)
- Fold the sides of the dough in. (I fold the right third in towards the center and the left third in towards the center.)Flip the dough and repeat the stretching and folding process on the other side.
- Return the dough to the bowl, cover, and allow to rise for another hour.Repeat the rest and fold period two more times (for a total of 3 hours).On the third folding, add the spices and fruit by folding into the dough. Spread the dough slightly and then sprinkle half the sugar (if using), cinnamon and dried fruit across the dough. Fold it like a letter, flip the dough, and spread it out again. Sprinkle the remaining sugar, cinnamon and dried fruit over the dough. Fold the dough one more time.
- Return the dough to the bowl and cover with a fitted lid, damp towel, or with plastic wrap.Do one of the following proofing methods (not both):Proof Refrigerated (Preferred Method): Place the dough in the fridge and proof for at least 8 hours, or up to 2 days (48 hours). If you used a towel (instead of plastic wrap) to cover the bowl, re-dampen the towel occasionally. Proof Unrefrigerated: (Only proof unrefrigerated if your kitchen is around 70°F or cooler). Place the dough out of direct sunlight on your counter and allow it to rise for about 8 hours, more or less, depending on the temperature. Check the bread to see if it's finished proofing by pressing the dough with a lightly floured or oiled knuckle. If the dough springs right back, allow it to keep proofing. If it's slow to spring back, it's ready.

Day 2: Finish Proofing + Bake
- Dampen a work surface and your hands.Gently turn the dough out onto the work surface. Form the dough into a ball, place it seam-side up, and cover with a damp towel. Allow the dough to rest for about 15 minutes.Next, use dampened hands to roll the dough into a round ball. Place the dough on parchment paper.
- If you proofed your dough in the fridge: Leave the dough to rise at room temperature until it's no longer cold (about 2½ to 3 hours).If you proofed your dough at room temperature: Leave the dough to rest on the parchment paper while the oven pre-heats, and then you can go ahead and bake.

- About 30 minutes before you're ready to bake, pre-heat your oven to 480°F. If using a non-enameled pot, place the pot in the oven during the pre-heat.Just before baking, lightly dust the dough with flour, and then use a bread lame or a floured knife to score the bread. (Scoring will give steam an outlet and will prevent the bottom of the loaf from cracking.)Scoring can be as simple as one or two long lines across the top. If desired, you can create a pattern while scoring for a more decorative final loaf.

- If you pre-heated the Dutch oven, remove it carefully from the oven. Place the parchment paper and dough into the Dutch oven. Lightly spritz the dough with water, and then add the Dutch oven lid. Slide bread into the pre-heated oven.Lower the oven temperature to 450°F.Bake the bread for 45 minutes covered, and then remove the Dutch oven lid and bake uncovered another 10 to 15 minutes, until the center of the loaf is 210°F. If you don't have a digital thermometer, you can try gently knocking on the bottom of the loaf to see if it sounds hollow.

- Use a spatula, tongs or the edges of the parchment paper to move the bread onto a cooling rack.Wait at least 2 hours before cutting into the loaf. It will be tempting to cut it earlier, but the bread is still baking internally. Cutting early will result in an under-cooked loaf.Store the bread lightly wrapped on the countertop for up to 4 days, or wrap tightly and freeze up to 3 months. I recommend slicing the bread before freezing, so that you can thaw individual slices if desired. Thaw frozen slices by toasting or heating over low heat on a stovetop griddle or pan.
Notes
- Make sure to use a very active sourdough starter. The size of the starter should (ideally) double within a few hours of feeding and (ideally) the starter should pass a float test.
- To do a float test, pinch off a small piece of starter and drop it in water. If it floats, it's ready. (This test isn't 100% accurate, but it's a good starting place.)
- Measure out 1 cup all-purpose flour. Remove 1 and ½ teaspoons of the flour.
- Add 1 and ½ teaspoons vital wheat gluten to the measured flour.
- Repeat with as many cups as needed or desired.
- Sift the flour together before using. For this recipe, make sure to measure the final amount by weight before proceeding. (Scoop out any extra and reserve for another use.)
- I highly recommend using a digital scale and measuring by weight (grams), not volume, especially if this is your first loaf (and especially for the flour).
- When using the scale, make sure to zero-out the weight of the bowl.
- If measuring by volume, scoop the flour into the measuring cup and then use the scoop to level off the cup. Do not measure by using the measuring cup as a scoop, because your flour will be packed too densely and your measurements will be inaccurate.
Carol tharp says
Using enamel Dutch oven that only an heat to 450 and recipe calls to preheat pan how should I proceed with recipe when instruction call for not preheating an empty enamel pot. Can I put dough into cold pot and still follow recipe for baking. Thank you CT
Alisha Trenalone says
Hi Carol! Two things that could help you -
1- This recipe requires the bread to be baked at 480-degrees F. So it's best to use a Dutch oven that's rated for that heat level.
2- Assuming your Dutch oven can go into the oven at 480-degrees, if you're using an enameled Dutch oven, they typically don't recommend pre-heating those, so we'd recommend skipping pre-heating the pot- but you would still need to pre-heat the oven. (See recipe card, "day 2", "step 3" - "If using a non-enameled pot, place pot in oven during pre-heat")
I hope that helps!
-Alisha at Champagne Tastes
Barb says
I made the cinnamon bread using your recipe and it's sooo good! it's like eating a cinnamon roll. very easy to follow directions. The dough was so easy to work with..Thank you for sharing ,the recipe. is a keeper!
Alisha Trenalone says
Hi Barb, that's fantastic! Glad you enjoyed it so much 😄
-Alisha at Champagne Tastes
Vermont Food Librarian says
This turned out to be a nice round loaf of sweet Sourdough Cranberry Cinnamon Bread. Even though I added some sugar, it was not too sweet. The texture and softness were perfect. I placed the dough in a cloth lined banneton bread basket brushed with rice flour after taking the dough out of the refrigerator. I let it warm up for 2 hours in the banneton and then placed it in the Dutch Oven.