
The Art Loeb Trail is a challenging 30-mile backpacking route in the mountains of North Carolina. Here are some tips for preparing to hike it!

While planning our backpacking trip on the Art Loeb trail, I realized that there wasn’t as much easily available information about this hike as I anticipated.
Good advice is truly helpful on this one! It's a difficult route, so you'll want to know what you're in for, as well as be able to pack the right gear.
Are you considering backpacking the Art Loeb trail? Here’s what we learned (both before and after) our hike.
See my section-by-section guide on backpacking the Art Loeb Trail for more hike details and photos.
Should I Hike North-Bound (NoBo) or South-Bound (SoBo) on Art Loeb Trail?
Each option has pros and cons.
One big consideration is that NoBo has more elevation gain (about 1,000 feet more) and SoBo has more elevation loss. If you struggle with knee pain when going downhill, NoBo might be better. (Keep in mind that the last 10 miles of NoBo still has a lot of downhill walking.)
That said, neither option is “easy” (or even moderately difficult). As the cashier at Second Gear (a used gear shop in Asheville) told me, “You can’t escape pain on the Art Loeb Trail.”
Another thing to consider is that many people prefer to avoid camping in the Shining Rock Wilderness, which is known for having more bear activity than the rest of the area. Some find it easiest to begin hiking SoBo and power through that section of the trail.

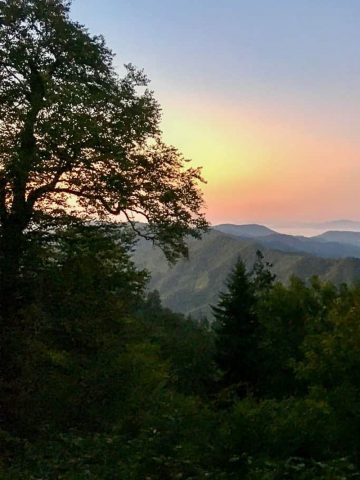
The main reason we decided to do this trail NoBo is because the most impressive views and overlooks would be at the end of the trail instead of the beginning, giving our group something to look forward to while hiking.

Do I Need a Trail Shuttle?
This is a point to point trail, not a loop. The north terminus is approximately a one-hour drive from the southern terminus.
To get back to your car after the hike, you have three options.
- Take a shuttle. This is the easiest option logistically, as you can drop your car at the finish point and then take a shuttle to the start point. Then your car is waiting for you at the end of the trail. We used Pura Vida for our shuttle ride, and found them wonderful to work with, highly communicative and reliable.
- Hike with a group and leave a car at each end of the trail. This option does add at least two hours of driving to your timeline.
- Yo-yo hike. Hike the trail again in the opposite direction to get back to your car. If you choose this option, it will turn your hike into a 60-mile journey with over 15,000 feet in elevation gain. That's ambitious.
What Special Challenges Does the Art Loeb Trail Have?
The Weather
North Carolina, like much of the east coast, can be highly unpredictable when it comes to weather. But it would be smart to plan for humidity, rain and (depending on the time of year) heat.
It rained hard on us during one day of our hike, and the trail turned into a creek. If it rains hard, your feet will get wet.

Keep in mind that the weather at the trailheads is likely to be different than the weather at the mountain peaks. I found Mountain Forecasts helpful for checking the weather forecasts for the peaks.
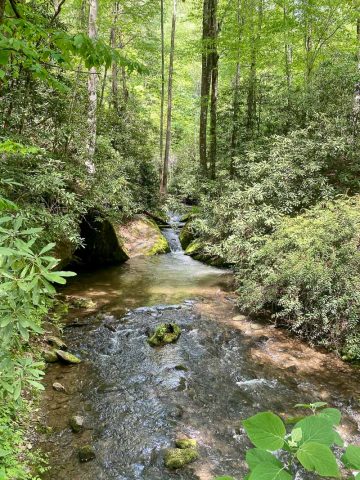
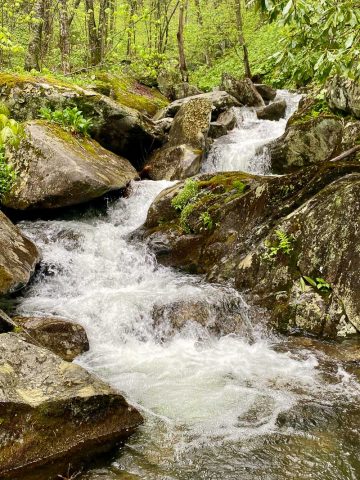
Water Availability
The water availability is fairly limited on this hike, especially if it hasn’t rained recently.
The water sources we used (or planned on using) were:
- Davidson River Campground was our initial plan for where to fill our water containers before the hike, but we ended up filling up at our hotel beforehand. I was glad we pre-filled, because the water was not right next to the trailhead.
- Butter Gap Shelter has a piped water source, which was not flowing when we arrived. (Maybe the pipe was clogged with mud?) Instead, we filled our water at the stream about 0.10 miles south of the shelter (on trail).


- Deep Gap Shelter has a water stream nearby also (we passed it just before arriving at the shelter along the Forest Service gravel road).
- About a mile north of Black Balsam summit, we took the Ivestor Gap spur trail and hiked 0.3 miles off-trail to a stream.
Staying Found on the Art Loeb Trail
About 24 miles of the trail are clearly marked.
For the clearly marked section, look for white blazes on the trees. One blaze indicates that you’re on the trail, two blazes indicate a turn in the trail, and three indicate a sharp turn.

The Art Loeb trail briefly follows the Mountains to Sea trail. In that section, the trail is marked with a reflective white plastic circle instead of the blazes.
The section of the trail that passes through the Shining Rock Wilderness (about 6 miles) has almost no trail markers. This section contains several unmarked trail junctions where it would be easy to get lost and increase your mileage.
We only saw one trail marker in this section (pictured below), and ironically, this was the one spot where we made a wrong turn.

There are actually two possible trails in the direction indicated. The one we needed was somewhat overgrown and we missed it. Happily our navigator (the hubby) noticed quickly on his digital map, and we found the correct trail.
I highly recommend downloading a digital map and referencing it at each trail junction on this section. Our group had a few digital maps available, including AllTrails and Gaia, but we primarily relied on the map on my husband’s Garmin Fenix watch.
(Considering switching from an Apple watch to a Garmin? Here are some pros and cons!)
I also carried my Garmin inReach mini, but found that the battery life struggled on this trail because of the heavy tree cover for most of the hike. It seems to drain the battery when the device has to attempt resending a tracking point or message multiple times.
I was still happy to have it as an emergency backup, despite needing to charge it in the middle of the trip.
We also carried (and referenced often) this Art Loeb trail guide. It was incredibly helpful for locating water and campsites. If you’re in the Lexington, Kentucky area, I’ve seen it in person at J&H Outdoors.

Will I Have a Cell Phone Signal?
The answer to this is: off and on. In the valleys you probably won’t. On the mountain peaks, I often had 2-3 bars of signal (in 2024 on Verizon towers).
It was nice having a signal to check the upcoming weather forecast.
What If Something Goes Wrong?
For every backpacking trip, it’s good to have emergency outs. This trail crosses roads several times, so there are quite a few spots where you could be picked up if needed.
Many places on the trail have cell signal, so if needed, you could text for help. If you’re down in a valley, it might be a hard hike before you get a signal, so if you’ve got one, bring an emergency satellite device, like the Garmin inReach mini.
Another resource could be your shuttle driver. Joe with Pura Vida let us know that we could text if something went wrong and he’d get back to us as soon as possible. Thankfully we didn’t have to.
Do I Need a Bear Canister?
The US Forest Service requires a bear canister for the Black Balsam and Shining Rock areas, the northern portion of the trail.
So yes, bring a bear canister. We use this one. If you don’t already own one but are using a trail shuttle, check with your shuttle company. When we booked, Pura Vida offered bear canister rentals.

What Gear Should I Bring?
Water + Food
You’ll want a water filter (even for the piped springs). We use a Sawyer Squeeze. We also recently started using a Cnoc water bag to easily collect dirty water, and then filtered the water into our water reservoirs and bottles.
I’d also recommend bringing a little more water storage than you usually carry, because the water sources can be fairly spaced out depending on how much it’s rained recently. This is especially true when it’s hot out.
Each person in our group carried an average of four liters of water per person, using water bladders and water bottles. I used a 3-liter Osprey water bladder and a Smartwater bottle.
This is an exceptionally difficult hike, so make sure to bring enough calories to fuel your journey. We brought along some freeze-dried meals, as well as snacks like jerky, peanut butter packets and gummy bears.
Clothing + Shoes
Bring extra socks and breathable hiking shoes or boots.
I made the mistake of bringing “waterproof“ hiking boots, and when we got absolutely drenched on day 1, the non-breathable outer was just not able to dry out, especially with high humidity and nighttime rain.
The shoes stayed so wet that even a new pair of dry socks would quickly get soaked through from the shoes. The entire rest of the trip, I had to periodically wring water out of my shoe insoles and merino socks, and I got blisters from hiking for prolonged periods in wet socks and shoes.
My husband hiked in (non-waterproof) Altra Lone Peaks and Hollow alpaca socks. While his socks and shoes did also get soaked, they both dried out quickly. Lesson learned.
It’s also a good idea to bring a rain jacket (or even an emergency poncho). If you’re looking for ultralight options, we brought along a women’s Black Diamond Stormline jacket and a men’s ultra-light Montbell rain jacket.
Other Gear
I definitely recommend trekking poles for this hike. I found myself relying on mine for balance on steep trails and to take pressure off my knees on steep inclines.
You’ll likely want to bring a rain cover for your pack (or a pack liner) in case of heavy rain. We like these REI duck's back covers (pictured below), and I’ve recently started using an Osprey pack cover that snaps around the pack for a tighter fit.

You may want to bring along some type of bug repellent. We used a natural one containing mostly oils, and it worked well.
I can’t imagine not bringing my sunglasses, but during the entire three days, I never needed them for more than maybe five minutes. It’s possible that the overlooks and the more exposed section of the hike will be sunnier for you, but know that the vast majority of the hike is under thick tree cover.
For more backpacking gear recommendations, check out our favorite backpacking gear, our tent shopping guide, our ultralight tent review of the X-mid 2 and Double Rainbow, and our favorite backpacking packs for petite women.
More North Carolina Adventures
This trail is not too far from Asheville, where you'll find lots of fun food and drink spots. We enjoyed visiting the Sierra Nevada Brewery and Taproom, New Belgium Brewery, and the nearby Souther Williams Vineyard.
Incorporating a day or two in Asheville could be a nice treat after having braved the Art Loeb Trail.
You're also within an hour or two of the North Carolina side of the Great Smoky Mountains National Park. Hiking on this side is one way to avoid the most crowded areas of the park.
Do you have any questions about preparing for the Art Loeb trail? Let me know in the comments!

Leave a Comment: