
This trail guide will fill you in on backpacking the Art Loeb Trail, a challenging 30-mile hike in the mountains of North Carolina.

We backpacked North Carolina's Art Loeb trail in June 2024. Because this is such a challenging hike (with only limited information available online), I've compiled a trail guide based on our experiences. I hope this will help you get up to speed on the terrain and other details!
For tips on preparing and planning your hike, check out our separate post.
How Difficult Is Backpacking the Art Loeb Trail?
It’s extremely difficult. The trail is approximately 30 miles long, and has over 7,300 feet in elevation gain if you hike southbound, or 8,103 feet if you hike northbound.
Initially those numbers didn’t seem that different from other hikes I’ve done, but the trail itself is challenging enough that our group of fairly experienced hikers/backpackers found it difficult to move as quickly as we normally do. We planned on 10 miles a day, which initially sounded totally doable, and while we DID complete the 10 miles per day, they were slow-moving.
There’s a LOT of up and down on this trail. See the Garmin elevation map from our trip below.

The majority of this trail is rocky with tree roots across the path.
Sections of the path could be treacherous in bad weather — in particular (coming northbound), the steep ascent to Pilot Mountain, the switchbacks just north of the Blue Ridge Parkway on the ascent to Black Balsam Knob, and the “Narrows” section where the trail becomes more technical on Cold Mountain.

Expect some short rock scrambles.
Backpacking North-Bound on the Art Loeb
How Many Days Do I Need?
Our backpacking trip on the Art Loeb Trail took three days. Here’s what that looked like (going NoBo).
Note that the elevations mentioned below are from a Garmin and are estimates; each of our tracking devices estimated slightly different elevation.
- Day 1- Davidson River Campground to Chestnut Mountain. 3,712-foot elevation gain, 2,222-foot elevation descent. This was a tough first day, I think because we got a later start (after our morning shuttle drop-off) and it was already hot outside.
- Day 2- Continue past Black Balsam Knob to the Ivestor Gap intersection for water and a campsite. 4,480-foot elevation gain, 2,279-foot elevation descent. I expected this to be the hardest day, and it was definitely tough, but we got a much earlier start and didn’t deal with the hot temperatures of the day before.
- Day 3- Continue all the way down Cold Mountain to the Camp Daniel Boone trailhead. 1,192-foot elevation gain, 3,708-foot elevation descent. This day did include some technically difficult sections of trail, but overall seemed like smooth sailing compared to the first two days.
In hindsight, four days might have been better, but the three-day trip did work for us.
Before the hike, we drove to the Daniel Boone Campground, left our cars in the trailhead parking area, and took a pre-booked shuttle to the southern terminus.

Information on choosing which direction to hike and on shuttle logistics are in our other Art Loeb post.
Day 1: Davidson River Campground to Chestnut Mountain
Our Pura Vida shuttle dropped us at the Davidson River Campground mid-morning, and off we went! The trail starts off on an easy flat loop, but quickly splits off and begins to climb.

It climbs and climbs some more.

This was one of the most difficult days mentally (in my opinion), because it’s a long upward haul with all green tunnel and no views. We hiked for a few hours and then stopped for lunch at an empty camp area.

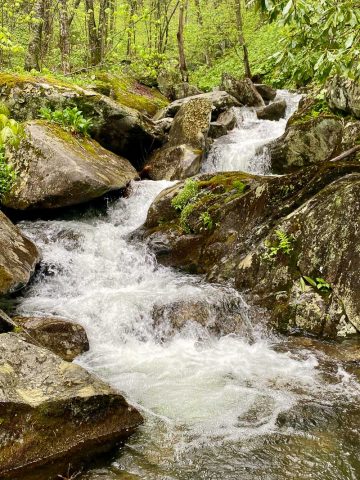
In the early afternoon, as we continued our upward hike in the heat and humidity, a rainstorm rolled in. The rain was cooling and very much welcomed, although it did turn the whole trail into a flowing creek.

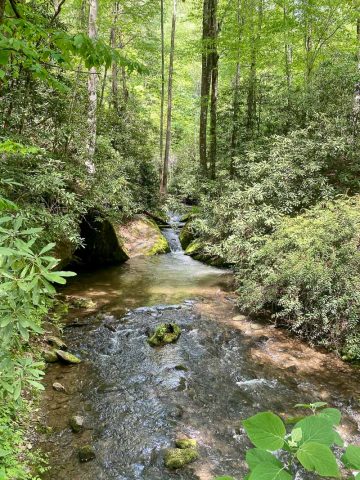
Just before the Butter Gap shelter, we reached a nicely flowing stream that we used for our first water refill.

At the (newly rebuilt) Butter Gap shelter, we ate dinner before continuing onwards and upwards.

As we kept hiking, we made stops both to catch our breath and to admire the snails, mushrooms and flowers we saw along the way.


We arrived at the summit of Chestnut Mountain and pitched camp, just in time for another rainstorm to hit. Thankfully that was the last rain we had on the hike!
For an overview of how to handle this situation, see my guide to backpacking in the rain!
Day 2: Chestnut Mountain to Black Balsam Knob
Day 2 started with a descent from Chestnut Mountain, and then we had even more elevation to cover than on day 1. However, the early start and the cooler temperatures at higher elevation helped a lot, so this day felt easier than day 1.
That said, it may have been a little ambitious to attempt to climb Pilot Knob and Black Balsam on the same day. I’m grateful that the weather cooperated.
We began our first big elevation gain on day 2 with a hike up Pilot Knob. Parts of this hike were rock scrambles.

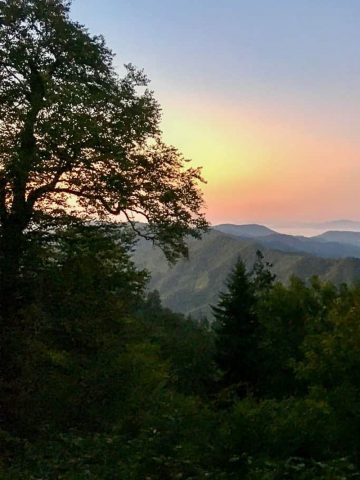
When we finally reached the summit of Pilot Knob, the view (along with a snack) was quite the reward!

The halfway point for us was the Deep Gap shelter. About a half-mile before the shelter there’s a trail tripping hazard: a metal pipe sticks out of the ground a few inches. Watch your step.

We stopped for lunch and did another water refill at the (also newly rebuilt) Deep Gap shelter.

After lunch, it was time for our second big climb of the day — up Black Balsam Knob. The trail stayed steep.

After the trail crosses the Blue Ridge Parkway, you’ll reach a series of incredibly steep switchbacks.


Despite being a difficult portion of the trail, we found this section to be especially pretty.
When the trail reaches the Mountains to Sea trail, the two trails intersect for a bit and you’ll hike through a gorgeous pine forest.


And then the views begin! Black Balsam Knob, even in the fog, is strikingly beautiful.
Initially I planned to camp at the summit of Black Balsam, and there were multiple open spots, but when we saw how windy and exposed the summit area was, we changed our minds.
Instead, we hiked about another mile to the (unmarked) Ivestor Gap junction (35.33611, -82.87328) where we located a campsite near water.
A word of warning: This was a fairly miserable campsite (overgrown, and not level), because all the good spots in this area were taken and we were too tired to keep searching.
Black Balsam Knob is the most populated area you'll find while backpacking the Art Loeb Trail. Because there's a road nearby, car campers frequent this section — something to keep in mind if you're hoping to camp nearby.
Day 3: Down Cold Mountain to Camp Daniel Boone
After breakfast and one more water refill near our Ivestor Gap trail campsite, we headed back to the main trail and on towards Tennant Mountain.


Tennant Mountain provided us with more foggy mountain views.

We also saw some brave souls who pitched camp at the top of the mountain. I’m a little jealous of their morning views, but not of the wind they likely listened to all night long.

As we entered the Shining Rock Wilderness, we were greeted by even more gorgeous views.


At this point we began checking our digital map at each trail junction, and sometimes in between, just to make sure we were on the right path. From this point on the trail has almost no markers.
There were no trail blazes, but there were so many gorgeous views!


After we re-entered tree cover, we began to see the all the shining rocks that I presume this wilderness is named for. There was quartz everywhere! One especially large quartz rock looked like something out of a storybook.


We eventually reached “the Narrows,” where the path begins to narrow along a ridge line. Step carefully here.
This section also includes quite a few short rock scrambles.


At this point, the steep descent down Cold Mountain got even steeper.
When we reached the only trail marker (at least that we noticed), it confirmed that we were getting close to the end of the trail!

Take care when you reach this sign. There are two trails to the left and we initially chose incorrectly. The sign is quite literal: it’s pointing directly at an overgrown, hard to see path. Take that one.
This final section of the path was steep and rocky. Despite having some pretty flowers, mushrooms and streams, this is where I started to get tired.


As you get closer to Camp Daniel Boone, you’ll likely meet up with Scout groups on the trail.

When we finally got to the bottom, we all celebrated, chugged Gatorade that had been left in the car, and devoured our final snacks. We felt accomplished, exhausted and hungry, so we headed towards civilization and food.

Morgan says
Hi! I'm looking at doing this trail with my dad. Can you share your mileages from each day? Anything you'd do differently? Thank you!!
Sarah Trenalone says
Hi Morgan! Each of our 3 days was about 10 miles, although on day 2 we had to go off-trail to find water and a camping site just past Black Balsam, so that day may have been a bit longer.
I think overall it went well, but we all struggled in the heat in early June (it was 90s and humid), especially since there was so much elevation gain. If I had it to do all over again, I'd try to do it a cooler time of year (possibly spring or late fall). I hope your hike goes well!
Preston Meurlott says
Hey,
Thanks for the trail write up, it is quite helpful.
Sarah Trenalone says
Glad it was helpful! Happy hiking 🙂