
This homemade oat coconut milk is an easy, non-dairy milk made from pantry staples. It's perfect for cereal and smoothies! No high-power blender required.

Recently, my friend Nicole posted on her Tea on the Trail Instagram account about her struggles to make homemade oat milk.
When I saw her post, I wondered, how hard could it be?
First, I chatted with Nicole about what went wrong when she made homemade oat milk and then went from there.
I tested. And tested some more.
I also dumped a bunch of oat milk all over myself and my kitchen floor. It was an ordeal.
What I found was that making homemade oat milk is not difficult, but it is a little tricky.
It's also pretty thin (like skim milk), and I wanted to make my oat milk a little bit thicker. So I added (just a little bit) of coconut milk.
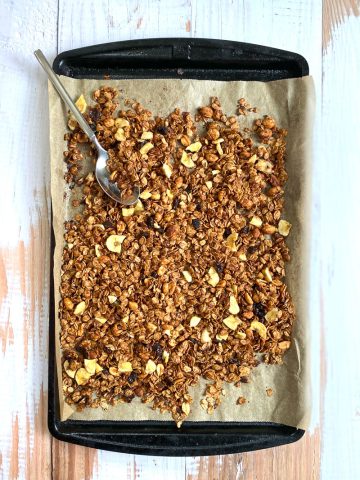
This oat coconut milk is rich and creamy, simple to prepare, and is perfect for cereal (like this homemade muesli) and smoothies.
The Oat Milk Golden Rule: Keep It Cold
A few things can go wrong when you're making oat milk, and they almost all go back to breaking this rule.
Keep the oats cold.
If your oats get warm or hot, they'll cook.
That means your milk could taste excessively oaty (like oatmeal) and the texture could become slimy.
To keep them cold, I recommend using ice-cold water while blending. This will keep the blender from heating the water up to a point where it "cooks" the oats.
Also, if you're using a Vitamix (or another high-powered blender), avoid using the high blending settings. These blenders can generate a lot of heat when turned to high.
Do I Need a High-Powered Blender?
No, you do not!
High-powered blenders (like Vitamix, Blendtec, or Ninja) will pulverize the oats more quickly than, say, a Nutribullet or Oster.
If you're using a standard (not high-powered) blender, I recommend blitzing the oats in a dry blender basin before starting. That will give your blender a head start.
Do not attempt to soften the oats first by soaking them. That's another way to make oatmeal.


What's the Best Way to Strain Oat Milk?
I think this is probably a personal preference.
It's going to depend on how well your blender pulverizes the oats and how much time you're willing to spend waiting on the oats to drain.
My preference is to line a mesh sieve with cheesecloth to strain the milk. It works fairly quickly, and catches most of the sediment.
If it's not strained enough for your preference, you can strain it through the cheesecloth a second time.
The drawback of using cheesecloth is that it tends to be single use, and will likely fall apart if you try to keep reusing it. Buy organic, compostable cheesecloth, or use (and keep reusing) muslin instead.
Other options include using a nut milk bag, a tea towel, a thin t-shirt, or a coffee filter to strain the milk. I found that the milk clogged these fabrics and didn't strain quickly (for me), but use whichever straining material you prefer.


Can I Heat This Milk For Coffee?
Sadly, I don't recommend that.
This oat coconut milk is best served cold.
I wanted this to be an oat milk you can use in coffee. I wanted it to froth beautifully (like my store-bought oat milk does).
What I quickly realized is that heating homemade oat milk tends to make... well, oatmeal.
A lot of store-bought oat milks do froth well, but it's because the milk has added oils.
Califia's barista-blend oat milk has sunflower oil and Oatly's oat milk contains rapeseed oil.
If you're looking for an oat milk to heat, steam, or froth for a latte or cappuccino, I recommend buying Trader Joe's oat beverage, which uses hydrolyzed oats and water, no oil. Although, I admit I'm not sure what hydrolyzed oats are.
Why Make Oat Coconut Milk?
If you can't heat this up for your morning cup of Joe, what's the point in making it at all?
This is the question I asked myself as I dumped out batch after batch of failed hot oat milk.
Well, there's a lot of reasons to make this oat coconut milk!
For one thing, this oat coconut milk is a truly delicious dairy alternative.
We are big dairy fans in my home, but dairy milk is perishable, and sometimes we run out. It's nice to have a backup.
I actually prefer the flavor of this homemade oat coconut milk more than dairy milk for drinking cold. It has a really pleasant flavor!
Plus, not all milk is served hot in coffee.
Anywhere that you'd normally use chilled milk, you can swap it for this non-dairy version.
How to Make Thicker Oat Milk (with Coconut!)
Homemade oat milk is thinner than I'd like it to be.
My solution is to add a little bit of coconut! It thickens the milk nicely without adding a heavy coconut flavor.
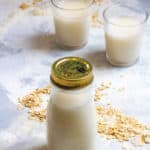
In the photo below, the glass on top has coconut added and is visibly thicker.

How to Make Oat Coconut Milk
Start by blending rolled oats with ice cold water.
Strain the mixture through cheesecloth (or your fabric of choice).
Next, blend a little more water with coconut. You'll blend the coconut for longer than the oats to make sure it really gets well-blended.
Pour the coconut liquid through the same cheesecloth. Store the milk in the fridge and use within a few days.
Now you've got an easy dairy-free milk that you can make from pantry staples!

Oat Coconut Milk
Equipment
- cheesecloth
Ingredients
Oat Milk Base:
- 1 cup rolled oats gluten-free certified if needed; do not use steel cut oats
- 3 cups water, icy cold
- 1 teaspoon maple syrup or date (pit removed), optional
Oat Coconut Milk:
- ½ cup unsweetened coconut flakes (or shredded coconut)
- 1 cup water
Instructions
- Blitz oats in a dry blender basin to grind into a powder.If using a high-power blender (like a Vitamix), you can skip this step.

- Add the oats, ice water, and date or syrup (if using) to a blender basin. Blend together the oats and cold water for 30-40 seconds. Do NOT blend longer.If using a high-power blender (like a Vitamix), avoid blending on high, because the blender will generate heat and begin to cook the oats.

- Line a mesh sieve with cheesecloth and place over a large bowl or jar. Pour the oat milk mixture through the cheesecloth to strain.

- Next, add the coconut and remaining water to the blender basin. Blend for about 3 minutes. Pour the coconut mixture through the cheesecloth with the oat milk.If desired, strain liquid again.

- Serve this oat coconut milk cold. This milk does not heat well, and is best used for cold dishes like cereal and smoothies.Store the oat coconut milk in the fridge and use within about 5 days. You'll know when the milk has spoiled because it will smell sour.
Notes
- Make sure to use icy cold water (it will help keep the oats from cooking at all).
- Do not blend longer than 30-40 seconds, and do not turn a high-power blender on high. Either will cause the blender to generate heat and could cook the oats.
- Avoid squeezing the bag when straining.


Helen says
could i use a cup of coconut milk instead of coconut flakes and a cup of water???
Alisha Trenalone says
Hi, Helen. Yes! That would work just fine.
-Alisha at Champagne Tastes
Natalie Charnetski says
Could I use a variation where there is less oat and maybe canned coconut milk? Or would you just make oat milk as the recipe explains and then add coconut milk as desired?
Alisha Trenalone says
Hello Natalie! We haven’t tried that, but I think using fewer oats and canned coconut milk would work well. Keep us posted!
-Alisha at Champagne Tastes