Champagne Tastes®

  • About
  • Travel
    • Food Travel
    • Outdoor Adventure
  • Recipe Index
    • Garden To Table
    • Seafood
    • Camping Recipes
    • Ferment
    • Backyard Foraging + Wild Game
    • Cooking Basics
  • Subscribe
menu icon
go to homepage
subscribe
search icon
Homepage link
  • Recipe Index
  • Garden To Table
  • Seafood
  • Ferment
  • Foraging + Wild Game
  • Cooking Basics
  • Camping Recipes
  • Outdoor Adventure
  • Food Travel
  • Lifestyle
  • About
    • Facebook
    • Instagram
    • Pinterest
    • Twitter
  • ×
    Home » Garden To Table

    How to Dry Chives

    Published: Jul 17, 2020 · Modified: Oct 27, 2023 · 9 Comments

    This post contains affiliate links. As an Amazon Associate I earn from qualifying purchases.

    Jump to Recipe Save Recipe Saved!

    Do you want to preserve fresh chives and use them all year long? This tutorial will walk you through how to dry chives in the oven.

    Dried chives in a bowl.

    I'm on a mission this year.

    A mission to save my herbs.

    I want to preserve as many garden herbs as possible so that I can taste summer all year long.

    If you've been following along with my Instagram stories, you've seen my herb garden growing all season long!

    I started preserving herbs in early spring by making chive blossom vinegar and chive butter.

    More recently, I've been making batch after batch of dairy-free basil pesto (to freeze for later) and herb salt.

    This past week, I decided it was time to cut back my chives. They were starting to look a little sad, and I wanted to save as many chives as possible for later.

    Instead of making more chive butter, I opted to make a big batch of dried chives in the oven.

    How to Use Dried Chives

    Dried chives are awesome, because the flavor holds up really well.

    I tend to treat dried chives like I'd treat onion powder. The flavor is there, but it needs to be cooked in fat or liquid to help bring more of the onion flavor back out.

    I've swapped dried chives for fresh ones in these sautéed oyster mushrooms, and they work well in any type of buttery sauce.

    Dried chives also make a quick and easy garnish for any savory dish that needs a splash of color.

    How to Dry Chives in the Oven

    Rinse and dry your chives.

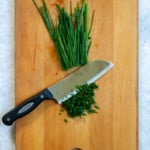
    Next, finely dice them.

    I usually just dice a bunch of them at once.

    Finely Dice Stalks.
    Finely Dice Chives

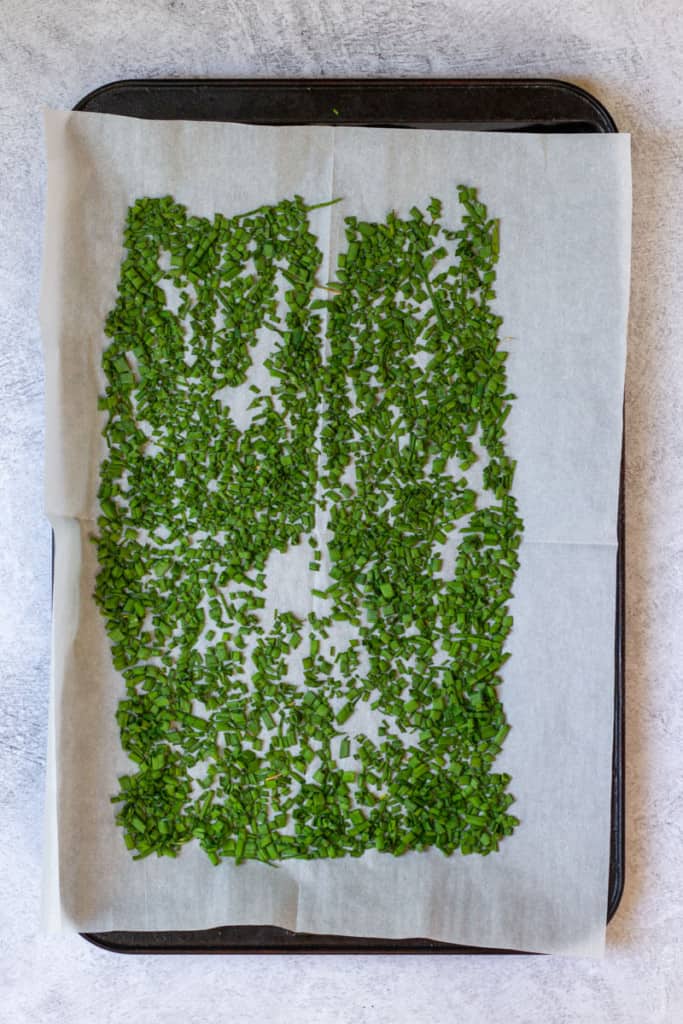
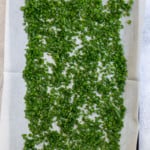
    Next, line a baking sheet with parchment paper or a silicone baking mat. Lining the baking sheet will make it easier to lift the chives off the baking sheet later.

    Add the chives in a single layer. Avoid overcrowding or overlapping the chives because they'll take longer to dry.

    Lay Chopped Up Stalks on a Baking Sheet.
    Lay Chives on a Baking Sheet

    Preheat your oven to the lowest temperature possible (either 150°F or 170°F, depending on your oven).

    Slide the baking sheet into the oven, and prop the oven door open with a wooden spoon.

    Start checking on the chives after about 25 minutes, and then continue checking on them every 10 minutes.

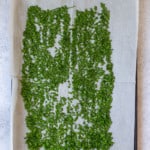
    The chives are done drying when they feel dry and crunchy to the touch.

    Heat Chives Until Dried.
    Heat Chives Until Dried

    If you aren't sure if your chives are completely dried, leave them on the baking sheet at room temperature for an hour or so before transferring them to a container.

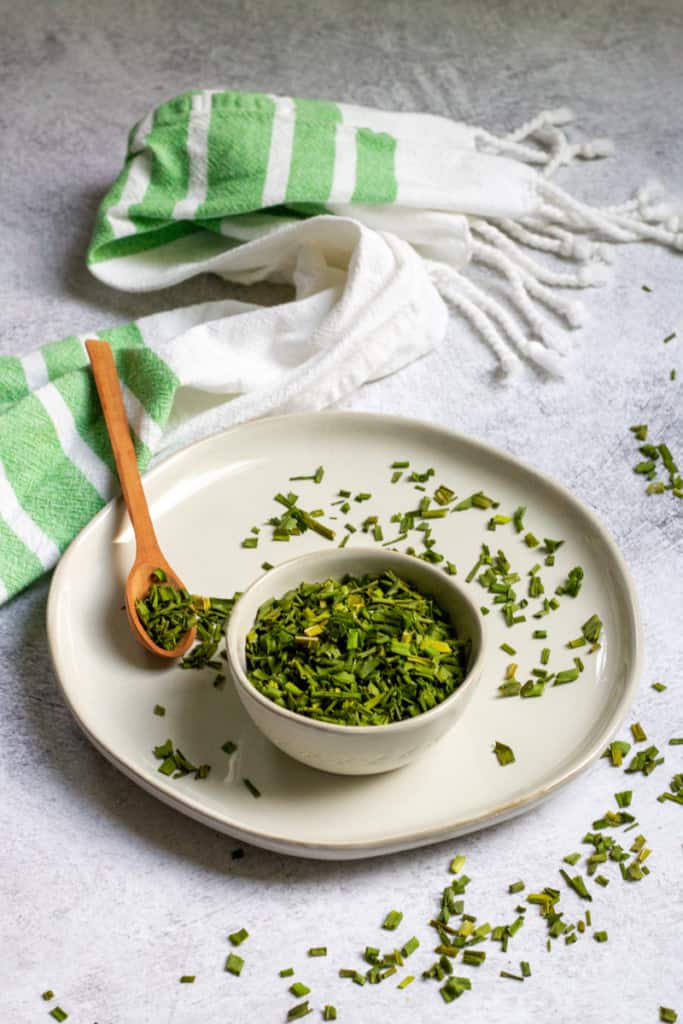
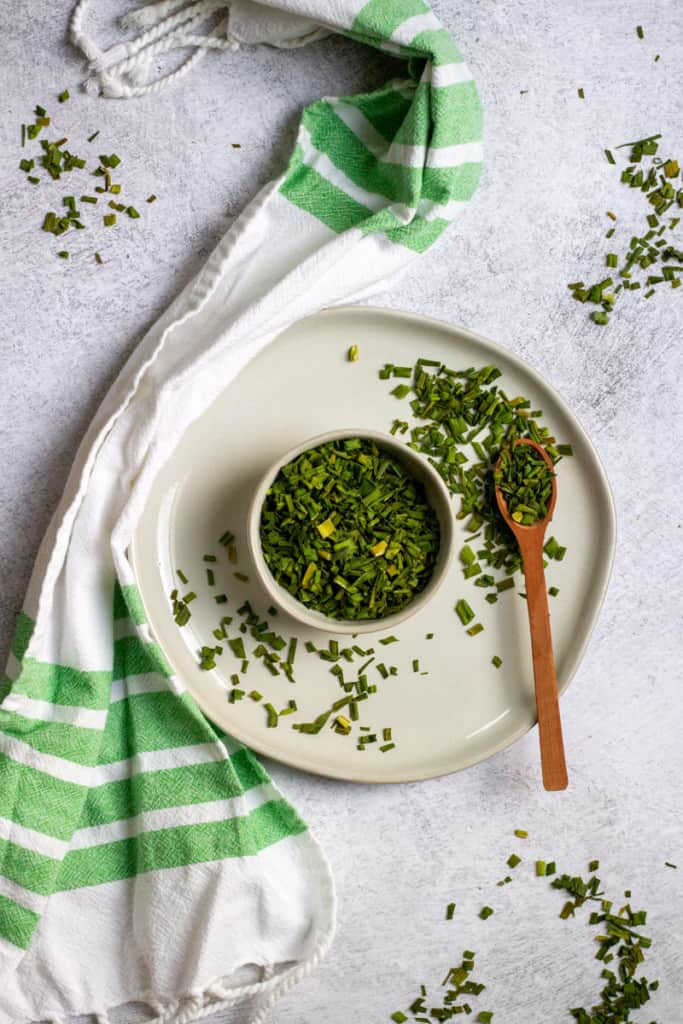
    When the chives are dry, store them in an airtight container and store them with your dried spices and herbs.

    Dried Chives in a Bowl.
    Dried chives in a bowl
    Print Recipe Save Recipe Saved!
    5 from 12 votes

    How to Dry Chives

    Do you want to preserve fresh chives and use them all year long? This tutorial will walk you through how to dry chives in the oven.
    Author: Sarah Trenalone
    Prep Time5 minutes mins
    Cook Time30 minutes mins
    Total Time35 minutes mins
    Course: Condiment
    Cuisine: American
    Diet: Gluten Free, Vegan, Vegetarian
    Servings: 16 people (1 TB servings)
    Calories: 1kcal
    Prevent your screen from going dark

    Ingredients

    • 1 bunch fresh chives

    Instructions

    • Preheat oven to lowest heat setting (150°F or 170°F) depending on your oven.
      Rinse and dry chives. (Chives should not be wet when going in the oven.)
      Finely dice chives.
      Finely Dice Chives
    • Line a baking sheet with parchment paper for easy cleanup.
      Lay chives on the baking sheet in a single layer. If chives are crowded, they will take longer to dry.
      Lay Chives on a Baking Sheet
    • Slide the chives into the oven. Prop the oven door partially open with a wooden spoon (or another heat-proof utensil).
      Begin checking chives after 25 minutes, and then again in 10-minute intervals until they are dry and crunchy to the touch.
      Store chives at room temperature in an airtight container or bag, and use within 2 years.
      Heat Chives Until Dried

    Notes

    Recipe amounts approximate.  Yield will vary based on how many chives are used and how finely they are diced.  Nutrition information estimates a total yield of 1 cup diced chives.
    Color Fading: Dried chives will gradually lose their bright green color.  As long as they still have a woodsy onion scent, they're still good to use!

    Nutrition

    Calories: 1kcal | Carbohydrates: 1g | Protein: 1g (2%) | Fat: 1g (2%) | Saturated Fat: 1g (6%) | Sodium: 1mg | Potassium: 7mg | Fiber: 1g (4%) | Sugar: 1g (1%) | Vitamin A: 109IU (2%) | Vitamin C: 1mg (1%) | Calcium: 2mg | Iron: 1mg (6%)
    Tried this recipe?Leave a comment and rating below!

    More Garden To Table

    • Two bowls and pot, all full of Chicken Kale Soup with Quinoa.
      Chicken Sweet Potato Soup
    • Apple cider sangria in glasses.
      Apple Cider Sangria
    • pancakes stacked on a plate, topped with butter and syrup.
      Peanut Butter Banana Pancakes
    • Pesto pasta salad in large bowl with spoon.
      Basil Pesto Pasta Salad

    About Sarah Trenalone

    Sarah is the primary creator at Champagne Tastes. She's a photographer, food writer and traveler, and is certified in Backcountry Kitchen and Backcountry Navigation from the Colorado Outward Bound School and Identifying Wild Plants from Backpacker.

    5 from 12 votes (9 ratings without comment)

    Leave a Comment: Cancel reply

    Your email address will not be published. Required fields are marked *

    Recipe Rating


    Comments

    All commentsI made thisQuestions
    1. GAIL LEPINE says

      July 19, 2021 at 9:19 am

      5 stars
      The easiest way to dice them is hold a bunch of them them tightly in between your fingers and use a pair of kitchen shears to snip them off to the size you want. It makes it so much easier than using a knife! Thanks for the information about drying chives. In the past I have frozen them but always wanted to try making my own dried chives. They are probably the most expensive dried herb to buy!

      Reply
    2. Heather Polsinello says

      September 22, 2021 at 4:01 pm

      why do you say to prop the door open?

      Reply
      • Alisha Trenalone says

        September 22, 2021 at 4:49 pm

        Hi Heather, propping the door open helps to lower the oven temperature a little bit. Good question!

        -Alisha at Champagne Tastes

        Reply
    3. Pat Carter says

      September 21, 2022 at 11:39 pm

      How can you keep the green color when drying

      Reply
      • Alisha Trenalone says

        September 22, 2022 at 1:58 pm

        Hi Pat! The color will fade slightly when drying, but they should still be fairly green when you're done!

        -Alisha at Champagne Tastes

        Reply
    4. Tammy OConnor says

      May 09, 2023 at 7:57 pm

      5 stars
      I have a gas oven and didn't even have to turn it on. The heat from the pilot light gave the perfect low temp. It just took a little longer... About 6 hours.

      Reply
      • Alisha Trenalone says

        May 10, 2023 at 10:00 am

        Excellent, Tammy! So glad it worked out well for you 😊

        -Alisha at Champagne Tastes

        Reply
    5. Lulu says

      November 08, 2023 at 12:12 pm

      5 stars
      I did this in my toaster oven using the "keep warm" setting, since that was the lowest it went. Took about 40 mins, came out great!

      Reply
      • Alisha Trenalone says

        November 08, 2023 at 6:07 pm

        Excellent to hear!

        -Alisha at Champagne Tastes

        Reply
    bio

    Hi, I'm Sarah! I'm a traveler who loves to eat.   Follow along to join me on my next adventure-- in food or on the road.

    Learn More →

    Currently Trending

    • langostino lobster rolls on a serving tray.
      Langostino Lobster Rolls
    • pan-seared rockfish on a plate
      Pan-Seared Rockfish
    • pan-seared red snapper on plates
      Pan-Seared Red Snapper
    • crab butter sauce on a platter with crab legs
      Crab Butter Sauce

    Footer

    About

    • Privacy Policy
    • Terms & Conditions
    • Supplemental Privacy Notice For California Residents
    • Supplemental Privacy Notice For Nevada Residents

    Newsletter

    • Sign Up! for emails and updates

    Contact

    • Contact
    • Recipe and Photo Reuse Terms + FAQ

    Copyright ©2015-2025 Champagne Tastes
    All Rights Reserved.

    Rate This Recipe

    Your vote:


    A rating is required
    A name is required
    An email is required

    Recipe Ratings without Comment

    Something went wrong. Please try again.